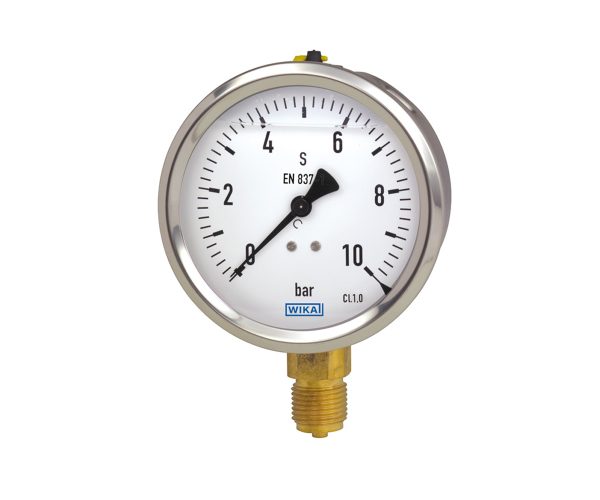
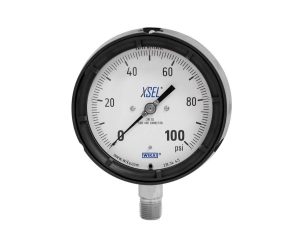
Bourdon tube pressure gauge, copper alloy Stainless steel case, case filling
- Very good vibration and shock resistance
- Especially robust design
- Type approval for the shipbuilding industry
- Scale ranges to 0 … 1,000 bar or 0 … 15,000 psi
- Responsive after-sales service / Customizable /
- High quality / One-year warranty
- The image is for reference; the actual product willbe based on your custom specifications.
Description
The liquid-filled model 213.53 mechanical Bourdon tube pressure gauge is constructed with a case from stainless steel and wetted parts from copper alloy.
WIKA manufactures and qualifies the pressure gauge in accordance with the standards EN 837-1 and ASME B40.100. As a safety function, this instrument has a blow-out device. In the event of a failure, overpressure can escape there.
Due to the case filling, the pressure element and movement are efficiently damped. Therefore, these instruments are particularly suited to measuring locations with high dynamic loads, such as fast load cycles or vibrations.
The cases of the model 213.53 are available in nominal sizes of 50 [2″], 63 [2 ½”] and 100 [4″] and fulfil IP65 ingress protection. With an accuracy of up to class 1.0, this pressure gauge is suitable for a wide range of applications in industry.
For mounting in control panels, the pressure gauges with a back mount process connection can be fitted with a mounting flange or with a triangular profile ring and mounting bracket.
Specifications
| Connection location | ■ Lower mount (radial) ■Centre back mount (only for NS 50 [2"] and NS 63 [2 ½"]) ■ Lower back mount (only for NS 100 [4"]) |
|---|---|
| Nominal size | ■Ø 50 mm [2"] ■Ø 63 mm [2 ½"] ■Ø 100 mm [4"] |
| Scale ranges | 0 ... 1,000 bar or 0 ... 15,000 psi |
| Accuracy | NS 50 [2"], 63 [2 ½"]: ■ EN 837-1: Class 1.6 ■ ASME B40.100: ±2 % │ ±1 % │ ±2 % of measuring span (grade A) NS 100 [4"]: ■ EN 837-1: Class 1.0 ■ ASME B40.100: ±1 % of measuring span (grade 1A) |
| Process connection | Standard: ■ EN 837-1 ■ ISO 7 ■ ANSI/B1.20.1 Size: EN 837-1: ■G ⅛ B, male thread ■G ¼ B, male thread ■G ½ B, male thread ■M12 x 1.5, male thread ■M20 x 1.5, male thread ISO 7: ■R ¼, male thread ■R ½, male thread ANSI/B1.20.1: ■¼ NPT, male thread ■½ NPT, male thread Restrictor: ■Without ■∅ 0.5 mm [0.02"], copper alloy ■∅ 0.3 mm [0.012"], copper alloy Material (wetted): Process connection: Copper alloy Bourdon tube: Measuring element |
| Case | Design: ■NS 50 [2"], 63 [2 ½"]: Safety level “S2” per EN 837-1: With blow-out device ■NS 100 [4"]: Safety level “S1” per EN 837-1: With blow-out device Position of blow-out device: NS 50 [2"]: Case back, at 12 o'clock NS 63 [2 ½"], 100 [4"]: Case circumference, at 12 o'clock Filling plug can be vented and resealed for internal pressure compensation Sealing towards process connection with O-ring Material: Stainless steel, natural finish |
| Window | ■ Plastic, crystal-clear ■ Laminated safety glass |
| Dial | Scale colour: Black Material: Aluminium Special scale: ■Without ■With temperature scale for refrigerant, e.g. for NH3: R 717 Other scales or customer-specific dials, e.g. with red mark, circular arcs or circular sectors, on request |
| Pointer | Instrument pointer: Aluminium, black Mark pointer/drag pointer: ■Without ■Red mark pointer on dial, fixed ■Red mark pointer on window, adjustable ■Mark pointer on bayonet ring, adjustable ■Red drag pointer on window, adjustable |
| Movement | Copper alloy |
| Filling liquid | ■Glycerine ■Glycerine-water mixture for scale range ≤ 0 ... 2.5 bar [≤ 0 ... 40 psi] ■ Silicone oil |
| Ambient temperature | ■Instruments with glycerine filling: -20 ... +60 °C [-4 ... +140 °F] ■Instruments with silicone oil filling: -40 ... +60 °C [-40 ... +140 °F] |
| Medium temperature | ■Instruments with glycerine filling: -20 ... +100 °C [-4 ... +212 °F] ■Instruments with silicone oil filling: -40 ... +100 °C [-40 ... +212 °F] |
| Ingress protection per IEC/EN 60529 | ■ IP65 ■ IP66 (only selectable for scale ranges ≥ 0 ... 20 bar [≥ 0 ... 400 psi]) |


